In the previous two posts, we discussed evaluating a new tree site for space, soil type and sun exposure – all important factors to consider when planting the “Right Tree in the Right Place.” Once these factors are determined, we can narrow the search to finding the suitable trees for your space.
In “Part 2” of this series, we discussed tree selection and covered a lot of information about the various tree species that I see doing well in Denver on a daily basis.
This third and final post in the series covers your trip to the nursery to pick out and buy the perfect tree, followed by how to properly plant the tree in your yard.
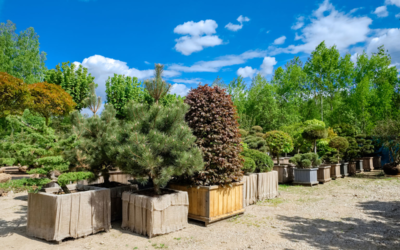
Most trees I’ve seen at nurseries are ones that do not do particularly well here in Denver. You have to remember, nurseries are in the business of selling trees and shrubs. Like every retailer aiming to sell more products, they present the trees in a perfect state, hoping that you will buy without question. Most of the trees you find at garden centers are grown in the Pacific Northwest or Midwest, where the soil and climate vary greatly from Colorado’s.
Choosing and Buying the Perfect Tree
The size of the tree you pick is usually determined by site restrictions and budget. Personally, I am a big fan of planting 2-2.5 inch caliper trees. This tree’s size makes it sturdy enough to withstand the elements, yet remain small enough to establish quickly and push new growth. We see a nearly 100% success rate with planting trees this size.
Over the past few years, we’ve seen an increase in demand for larger trees. We’ve planted a lot of 3-4 inch caliper trees with mixed results. Bigger B&B trees have a larger percentage of roots left in the field where they were grown. It’s pretty obvious to see why these trees have mixed results – they have a larger canopy with fewer roots.
-
Root and Trunk Inspection
When picking out a tree at the nursery, it’s important to examine the tree’s root ball, trunk and foliage. If any one of these do not look good, then pass. The root ball should be of good size in relation to the size of the tree. Inspect the root ball for any damage to the burlap or wire basket. I recommend grabbing the trunk and moving the tree slightly. The trunk should be held tightly by the root ball. If the trunk moves easily, it suggests that there is something wrong with the roots.
When inspecting the trunk, I start at the bottom and work my way up the tree. At the soil line, you should see a small flare. If the trunk goes straight into the root ball without any flare, it suggests that the tree may have been planted too deep. This can cause the many problems for the tree later in life.
Next, look for a mostly straight trunk that has a tapered form. The base should be wide and gradually narrow as you move up the tree. Also inspect the trunk for physical injury or any signs of disease. Choose a tree that has one main central leader with many small branches. This tree will hold up better in our May or October snow storms.
-
Healthy Foliage
The foliage will tell you if the tree is healthy or not. Choose a tree that has large, dark leaves rather than a tree that has smaller leaves and lighter in color. Look for any signs of disease or insects on the leaves. Insects can usually be controlled easily, but disease on a young plant may mean trouble in the future (if you think your young tree may be at risk of disease, be proactive for best results and learn more about how we can help). The foliage should be evenly distributed along the trunk of the tree. Low limbs help a tree establish quicker and produce a tapered trunk that is strong.
Planting a Tree Properly
-
Depth of Hole
The depth of planting is one of the most important factors to remember when planting a tree. The hole needs to be dug to a depth that allows 2-4 inches of the root ball to be above ground. This helps the newly planted tree receive the oxygen it needs to develop new roots. The width of the hole needs to be approximately 3 times the size of the root ball. This allows the tree space to develop roots more quickly before reaching our compacted, native soil.
-
Placing the Tree and Protecting the Root Ball
Once the hole is dug, place the tree next to the hole and remove the last rung of the wire basket and the bottom portion of burlap. Gently roll the tree into the whole. Be sure to keep the root ball intact during this process. If the root ball comes apart, survival of the tree is lessened. Once the tree is in the hole, remove the remaining wire basket, burlap and any twine that was used at the nursery.
-
Backfilling, Soil and Watering
We add about 5-10% of Peat Moss to the native soil and use this to backfill the hole. Once the tree is straight, we add a few inches of soil around the bottom of the root. We tamp the soil to stabilize the tree. Once the tree is stable, we back fill the hole to the height of the root ball. At this point, we use a water hose to get the soil to settle. Once the soil settles, we again add more soil until we are even with the root ball. Water the soil one more time. Check for areas that settled and add soil as needed. The soil level should be even with the top of the root ball and gradually slope down.
-
Adding Wood Mulch
Adding wood mulch over the entire dig area will benefit the tree in many ways. Wood mulch holds moisture and also acts as a temperature buffer. It decays over time which adds organic matter to the root zone. We add about 3-4 inches of mulch each time we plant a new tree. This depth benefits the tree and tends to keep weeds away.
Caring for Your New Tree
-
Water by Hand
Watering your new tree is the most important factor that determines its survival. Trees that are hand watered have a much higher success rate than those watered by an irrigation system. I feel so strongly about this, that we do not warranty trees that are watered by an irrigation system. Hand watering allows you to completely control the amount and frequency of water your new tree is receiving.
-
Amount of Water Needed
On average, a newly planted tree needs 5 gallons per inch diameter. For example, a 2 inch tree would require 10 gallons of water each time. Using two 5 gallon buckets is the easiest way to determine the amount of water your tree is receiving. Take a 5 gallon bucket and drill two small holes on the side near the bottom. This allows you to control the amount and also applies the water slowly.
-
Watering Frequency
The frequency of watering is determined by weather, nearby irrigation and soil type. If the newly planted tree is in a bed that does not receive any irrigation, the tree should be watered 2-3 times per week. In the early spring or late fall, two times per week should be enough. During the hot months of summer, 3 times a week would be more appropriate.
If the tree is planted in a lawn area that receives water from the lawn irrigation system, then you must examine the soil. Use a small hand shovel to determine the moisture level of the soil. We want to keep the soil moist but not soaked. If you water your lawn often and for longer cycles, you will need to water less often.
-
Fertilizing
I always get asked questions about fertilizing a newly planted tree. Fertilizing a newly planted tree will cause added stress to an already stressed tree. Remember your tree was growing in a field last year until it was dug up and placed in a Ball and Burlap. This process left most of the tree’s roots in the field. Fertilizing will push new crown growth for which the root system will have a hard time supporting.
We plant trees of all sizes and shapes to fit your needs. Consult with us for your next planting project and give us a call at 303-623-8733. We provide free estimates for tree planting, pruning, removal, cabling and bracing! We will help you choose a tree that will thrive in your space.


